
Set up for a single course
If your administrator has given you permission to manage LTI External tools, you can add new tools to your courses using the ‘Add tool’ button on the LTI External tools page.
Tools that you add at course level will appear in your activity chooser by default. You can remove them from the activity chooser by going to Course page > More > LTI External Tools and toggling them off in the column ‘Show in activity chooser’.
Add an external tool to Moodle
1. Click Add an activity or resource within your course

2. Choose External tool
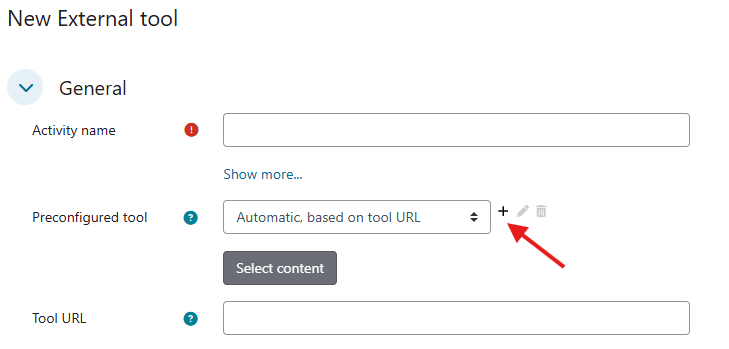
3. Click the + icon near Preconfigured tool to add a new external tool
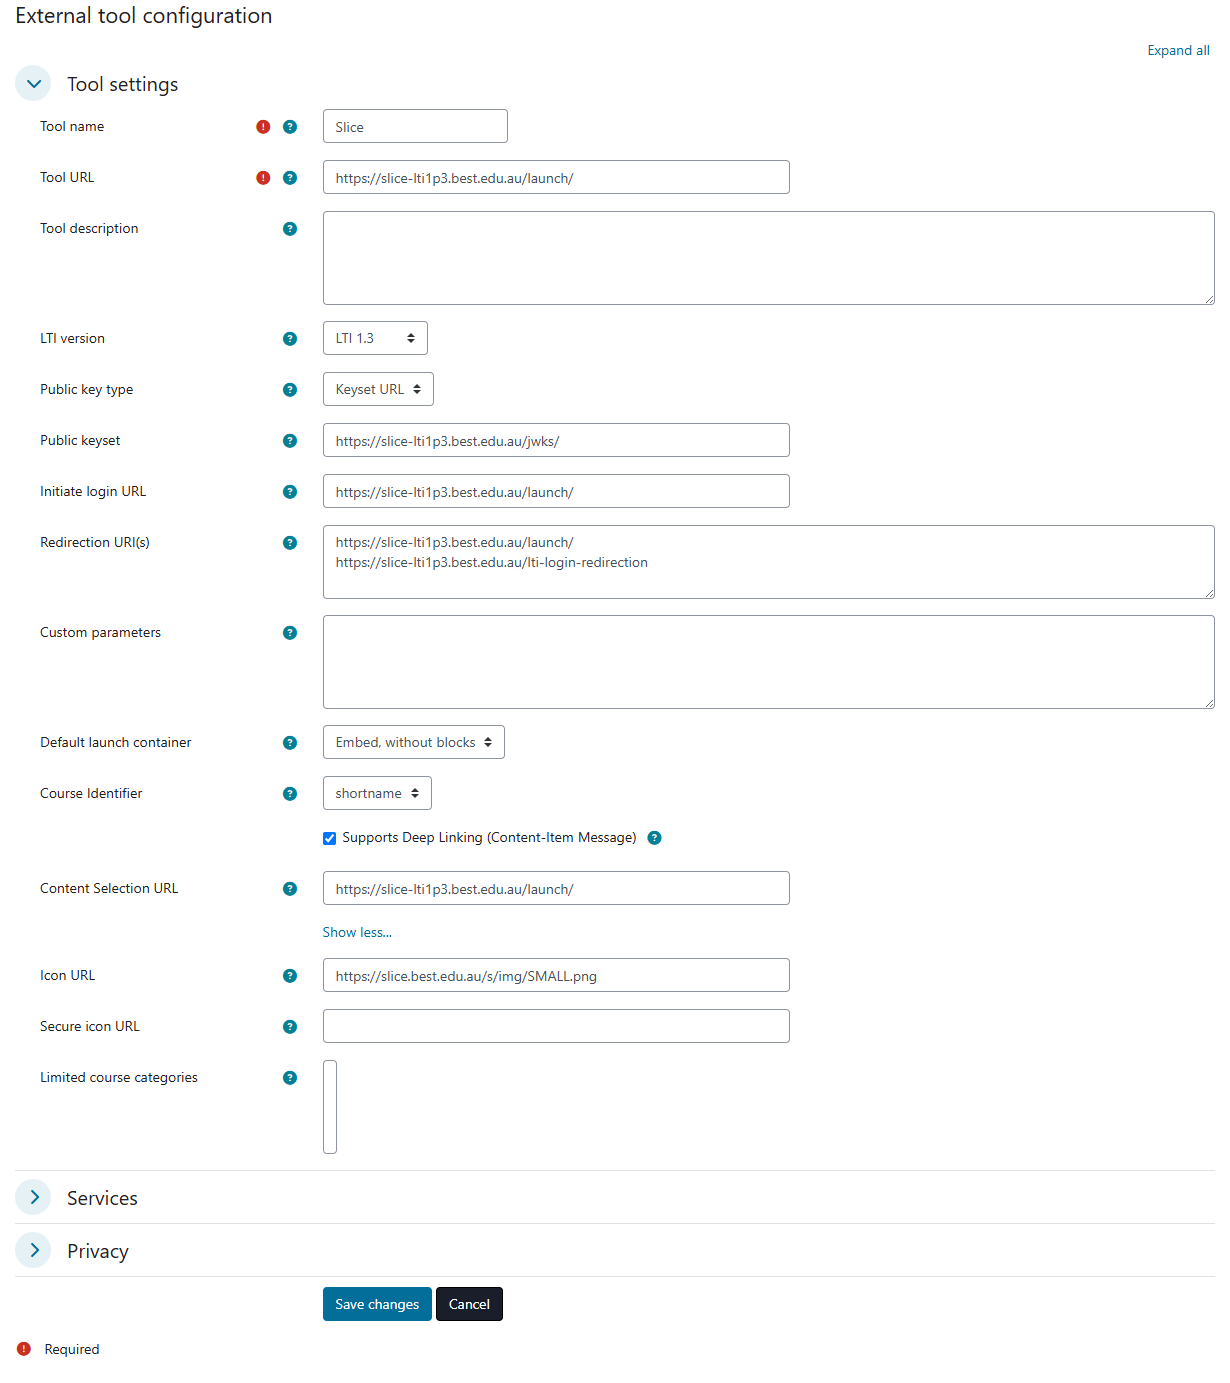
4. On the tool settings page complete the following details
Tool name: Slice (can be chosen by the individual/organisation)
Tool URL: https://slice-lti1p3.best.edu.au/launch/
LTI version: LTI 1.3
Public key type: Keyset URL
Public keyset: https://slice-lti1p3.best.edu.au/jwks/
Initiate login URL: https://slice-lti1p3.best.edu.au/login/
Redirection URI(s): https://slice-lti1p3.best.edu.au/launch/ https://slice-lti1p3.best.edu.au/lti-login-redirection/
Default container: Embed, without blocks OR New window
Course identifier: Shortname
Supports Deep Linking (Content-Item Message): ON
Content Selection URL: https://slice-lti1p3.best.edu.au/launch/
Choose Show more
Icon URL: https://slice.best.edu.au/s/img/SMALL.png
Services
Tool Settings: Use this service
Privacy
Share launcher's name with tool: Always
Share launcher's email with tool: Always
Share lti role shortname with the tool: Always
Share course idnumber with the tool: Always
Share lti role shortname with the tool: Always
5. Click Save changes
You will now need to identify 2 unique values for the set up of your LTI 1.3 connection. To do this:
6. Right click anywhere on the page to turn on the Inspect element for the page.
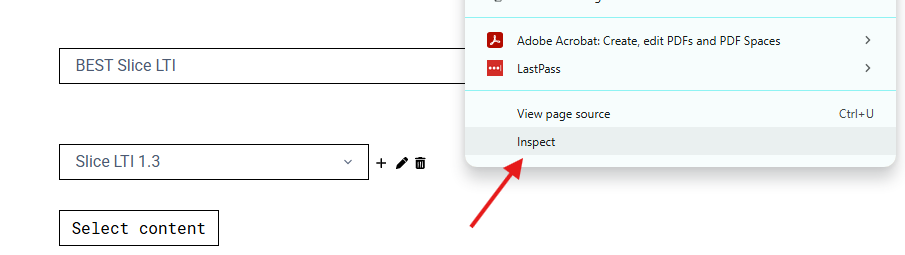
7. Choose the Network tab at the top of the Inspect page
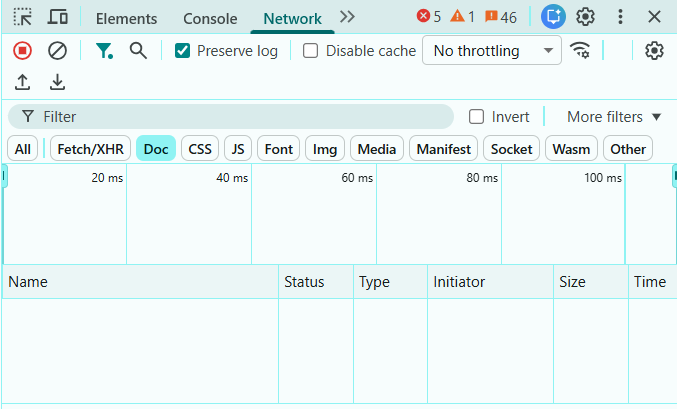
8. Click the Select content button on the Moodle page as if you were about to add a link to a Slice image or layer. In the Inspect page element on the right of your screen, click the line item for login/?lti1p3_new_window=1?iss=...
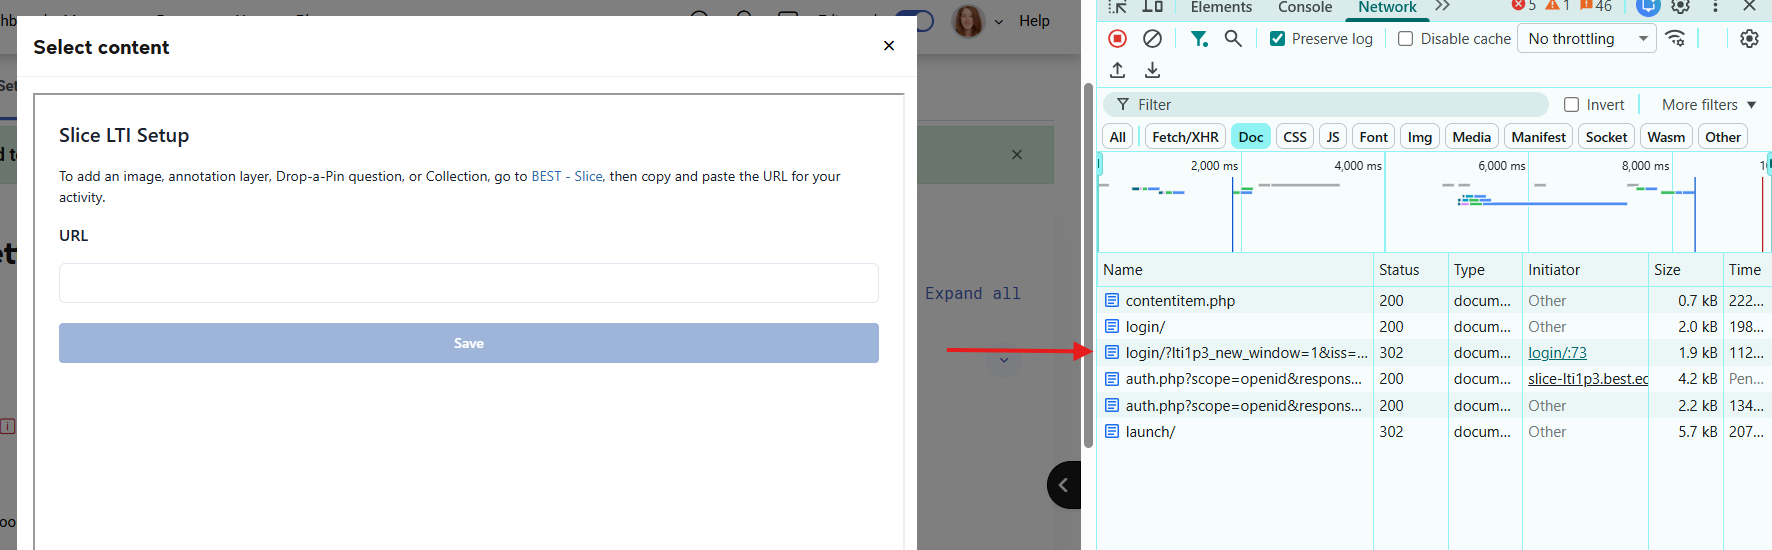
9. A unique 4 digit lti_deployment_id will be shown in the panel and an alphanumerical client_id. Keep this window open (or copy both values) and move on to the set up of the Slice LTI 1.3 connection in BEST account below.

Set up LTI 1.3 connection in BEST Account
- Open the Connect LMS section on the Slice Account Page.
- Fill the Connection Name with a name that is meaningful to your institution, e.g. BEST Network University Production environment
- Fill the LMS Platform URL/LMS Issuer Name field with the URL of your Moodle instance. e.g.
https://moodle.bestuniversity.edu.au/. Note below this example has been included in the URL fields below in bold as an example. Please replace this with your institutions URL. - The alphanumerical Client ID should be provided by Moodle in the Inspect element as described above
- Fill the OAuth2 Access Token URL field with e.g.
https://moodle.bestuniversity.edu.au/mod/lti/token.php - Fill the OIDC Auth URL field with
https://moodle.bestuniversity.edu.au/mod/lti/auth.php - Fill the Keyset URL field with
https://moodle.bestuniversity.edu.au/mod/lti/certs.php - Fill the Deployment ID field with the value of your course ID which should be visible in the Inspect page element as listed above e.g.
7146 - Click Save.
Set up for all courses
An administrator can manually configure external tools in Site administration > Plugins > Activity modules > External tool> Manage tools so that they are available across the site.